

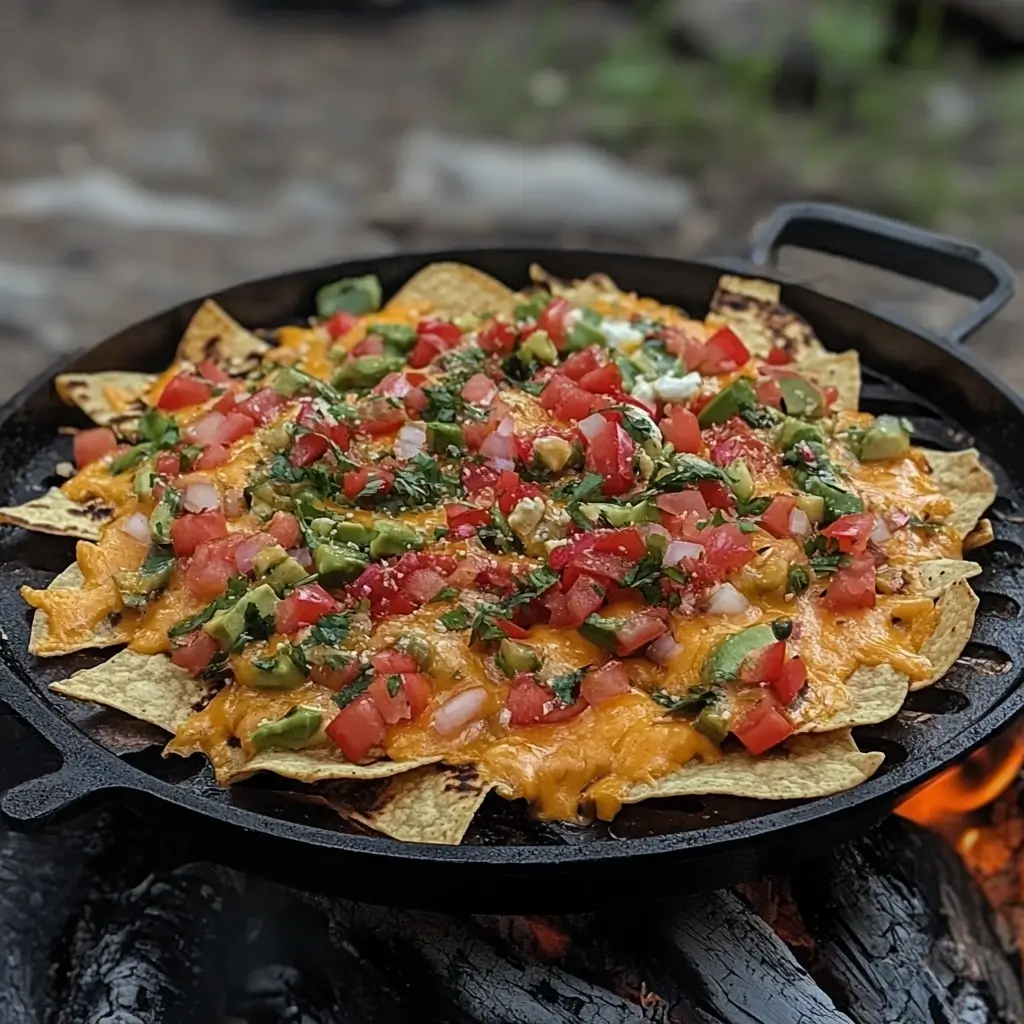
When it comes to camping food, simplicity and flavor are key. Campfire Grilled Nachos Recipe the perfect balance between convenience and taste, making them an ideal choice for outdoor enthusiasts. Whether you’re planning a weekend getaway or a long-distance road trip, this recipe will ensure that your meals are as enjoyable as the adventure itself. In this article, we’ll walk you through everything you need to know about making campfire grilled nachos, from ingredient selection to serving tips.
Introduction to Campfire Grilled Nachos Recipe
Why Campfire Nachos Are Perfect for Outdoor Adventures
Camping trips often come with unique challenges when it comes to meal preparation. Limited kitchen equipment, unpredictable weather, and restricted access to fresh ingredients can make cooking feel daunting. However, campfire grilled nachos solve many of these problems. They require minimal prep work, use readily available ingredients, and cook quickly over open flames. Plus, they’re incredibly versatile—you can customize toppings to suit any dietary preference or personal taste.
Nachos are also inherently social. Assembling layers of chips, cheese, and toppings around the campfire creates a fun group activity that everyone can enjoy. From kids adding their favorite snacks to adults experimenting with gourmet flavors, this dish brings people together in a way few others do.
Benefits of Cooking Over a Campfire
Cooking over a campfire adds a special charm to any meal. The smoky aroma infuses into the food, enhancing its natural flavors. For nachos, this means melted cheese takes on a richer, more complex taste profile. Additionally, grilling directly over flames ensures even heat distribution, which helps achieve perfectly toasted tortilla chips without burning.
Another benefit of campfire cooking is its eco-friendliness compared to traditional stoves. Using wood or charcoal reduces reliance on fossil fuels, aligning with Leave No Trace principles. Just be sure to follow local fire regulations and extinguish your fire completely after use.
What You’ll Need to Get Started
Before diving into the recipe, let’s talk about the tools and equipment you’ll need:
- Tongs : Essential for flipping nachos and handling hot items safely.
- Aluminum Foil : Creates a makeshift baking sheet for evenly heating the chips.
- Spatula : Useful for transferring cooked nachos onto plates.
- Cast Iron Skillet : Ideal for browning proteins and sautéing vegetables.
- Cooler : Keeps perishable ingredients like cheese and meat fresh during transport.
Having these basics on hand makes the process smoother and more efficient, allowing you to focus on enjoying your time outdoors.
Ingredients for Your Campfire Grilled Nachos
Base Layer: Tortilla Chips and Cheese
The foundation of great nachos lies in choosing high-quality tortilla chips and cheese. Opt for sturdy chips that won’t crumble under the weight of toppings. Brands like Mission Tortilla Chips are popular choices due to their consistent texture and affordability. If possible, bring a mix of plain and flavored chips to cater to different tastes.
For cheese, shredded options work best because they melt evenly. Cheddar and Monterey Jack are classic picks, but feel free to experiment with other varieties such as pepper jack for added spice or mozzarella for creaminess. To prevent clumping, store cheese in resealable bags inside your cooler.
Protein Options for Nachos
Protein is what transforms ordinary nachos into a satisfying main course. Ground beef or turkey seasoned with taco spices is a crowd-pleaser. Brown the meat in a cast iron skillet before layering it onto the chips. Vegetarians can substitute beans or tofu for plant-based protein. Black beans, pinto beans, and chickpeas all work well and add fiber to the dish.
If you’re feeling adventurous, try marinating chicken breasts in lime juice, garlic, and cumin before grilling them at the campsite. Slice the cooked chicken into strips and sprinkle it over the nachos for an extra burst of flavor.
Veggie Toppings to Add Flavor
Vegetables not only boost nutrition but also enhance the overall taste experience. Bell peppers, onions, and jalapeños are staples in most nacho recipes. Slice them thinly so they cook quickly and evenly. Sauté the veggies in olive oil until tender, then spread them across the nachos for color and crunch.
Other excellent veggie options include corn kernels, cherry tomatoes, and mushrooms. Roasting these ingredients over the campfire intensifies their natural sweetness and earthiness. Don’t forget to season lightly with salt, pepper, and chili powder for depth.
Sauce and Garnish Ideas
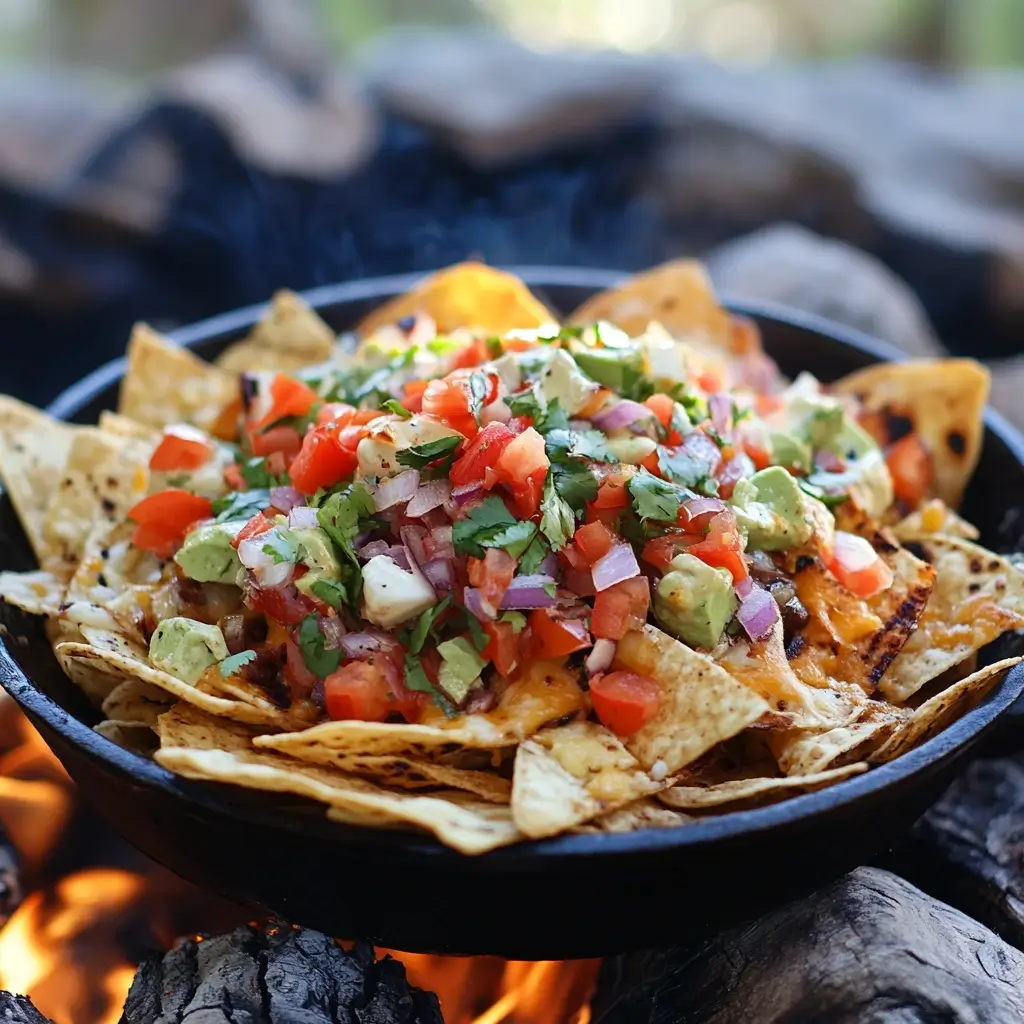
No nacho platter is complete without sauces and garnishes. Store-bought salsa varieties like Primal Kitchen Salsa save time and effort, but homemade versions allow for customization. Guacamole is another must-have topping that pairs beautifully with the savory components of the dish. Mash ripe avocados with lime juice, diced tomatoes, onions, and cilantro for a quick and easy dip.
Finish off your nachos with creamy sour cream, chopped cilantro, and a sprinkle of fresh lime juice. These finishing touches elevate the presentation and create layers of contrasting textures and flavors.
Step-by-Step Guide to Making Campfire Grilled Nachos
Setting Up Your Campfire Grill
Building a safe and effective campfire is crucial for successful outdoor cooking. Start by clearing a flat area free of debris and digging a shallow pit if allowed. Stack logs or charcoal in a pyramid shape and ignite them using matches or a lighter. Allow the flames to die down slightly before placing your grill grate on top. This indirect heat method prevents burning and promotes even cooking.
Alternatively, consider bringing a portable grill like those made by Traeger or Coleman. These compact devices offer greater control over temperature and eliminate the hassle of starting a fire from scratch. Regardless of your setup, always keep water nearby for emergencies.
Preparing the Nacho Base
Once your fire is ready, prepare the base layer of your nachos. Lay out large sheets of aluminum foil on a flat surface near the campfire. Arrange tortilla chips in a single layer, leaving enough space between each chip for melting cheese later. Sprinkle shredded cheese generously over the chips, ensuring full coverage for maximum gooey goodness.
To speed up the melting process, wrap the foil packets loosely and place them near the edge of the fire where heat is moderate. Check frequently to avoid overheating, as burnt cheese can ruin the entire batch.
Adding Proteins and Veggies
While the cheese melts, prepare your protein and vegetable toppings. Heat a cast iron skillet over medium-high heat and add a splash of oil. Cook ground beef or turkey until browned, breaking it apart with a spoon as it cooks. Drain excess fat and return the skillet to the fire. Stir in taco seasoning according to package instructions or create your own blend using chili powder, cumin, paprika, and garlic powder.
In a separate pan, sauté sliced bell peppers, onions, and jalapeños until soft and fragrant. Combine the cooked proteins and veggies in one bowl for easy assembly later. This step ensures all elements are ready when the cheese has melted.
Assembling and Grilling Your Nachos
With all components prepared, it’s time to assemble your nachos. Open the foil packets carefully to release steam, then distribute the protein and veggie mixture evenly over the cheesy chips. Close the packets securely and return them to the fire for another 5 minutes to meld the flavors together.
When ready, transfer the nachos to serving plates or communal trays. Top with sauces, guacamole, and garnishes just before eating to preserve freshness. Serve immediately while still warm for the ultimate campfire indulgence.
“For an in-depth look at different variations of grilled nachos, visit this comprehensive resource , which includes unique ideas for toppings and cooking methods.”
Tips and Tricks for Perfect Campfire Nachos
Choosing the Right Tortilla Chips
Selecting the right tortilla chips sets the stage for success. Look for thick, sturdy chips that hold up well under heavy toppings. Thin or overly crispy chips may break apart during assembly or become soggy once drenched in melted cheese. If packing space is limited, crush some chips beforehand and sprinkle them as a crunchy topping instead of a base.
Experiment with flavored chips for added excitement. Nacho cheese, lime, or chili-lime varieties introduce bold new dimensions to the dish. Remember to pack extras in case of unexpected snacking opportunities!
Melting Cheese Like a Pro
Melting cheese over a campfire requires patience and attention to detail. Low and slow is the golden rule here—exposing cheese to direct flames causes it to burn rather than melt smoothly. Use double-layered foil packets to trap heat while protecting the contents from scorching.
Shredded cheese melts faster and more evenly than blocks or slices. Mix different types for complex flavor profiles, such as combining sharp cheddar with mild Monterey Jack. Avoid overcrowding the chips with too much cheese, as this can lead to uneven distribution and wasted product.
Keeping Ingredients Fresh While Camping
Maintaining ingredient freshness is vital for preserving taste and preventing spoilage. Invest in a quality cooler equipped with ice packs or frozen gel bricks. Store raw meats and dairy products at the bottom of the cooler, where temperatures remain lowest. Keep condiments and non-perishables in separate containers to maximize organization.
Prep as much as possible at home to reduce stress at the campsite. Chop vegetables, measure spices, and portion out ingredients ahead of time. Label everything clearly to avoid confusion during hectic moments.
Customizing Nachos for Dietary Needs
Catering to diverse dietary preferences doesn’t have to compromise flavor. Gluten-free eaters can opt for corn-based tortilla chips or rice crackers. Keto dieters might prefer lettuce wraps or cauliflower crusts as alternatives to traditional chips. Vegans can swap animal-derived ingredients with cashew-based cheeses, tempeh, or lentils.
Encourage creativity by setting up a DIY nacho bar with various toppings. Let guests build their own creations based on individual tastes and restrictions. Providing options ensures inclusivity and fosters a sense of community among diners.
Serving and Enjoying Your Campfire Grilled Nachos
Pairing Nachos with Drinks and Sides
Drinks to Complement Your Campfire Grilled Nachos
When planning a camping trip, it’s essential to consider beverages that will pair well with your nachos and keep everyone hydrated. For families or groups looking for non-alcoholic options, lemonade, iced tea, or soda are refreshing choices. Lemonade, in particular, balances the spiciness of jalapeños or hot sauce often found in nacho toppings. Iced tea, whether sweetened or unsweetened, offers a soothing contrast to the rich flavors of melted cheese and seasoned meats.
Sides That Elevate the Meal
While nachos are undoubtedly satisfying on their own, adding sides can turn this snack into a complete meal. Corn on the cob is a classic camping side dish that pairs beautifully with nachos. Slather each ear with butter, sprinkle with chili powder, and finish with a dash of lime juice for a zesty kick. Another option is roasted vegetables, such as zucchini, bell peppers, and mushrooms, which can be cooked directly over the campfire or in a cast iron skillet. These veggies not only add color and nutrition but also provide a lighter balance to the indulgent nachos.
Grilled chicken skewers or kebabs offer a protein-rich alternative for those who want more substantial portions. Marinate chunks of chicken breast in olive oil, garlic, and herbs before threading them onto skewers with onions, tomatoes, and bell peppers. Cook these over the fire until golden brown and serve alongside the nachos for added variety. Finally, don’t forget dessert! S’mores or chocolate fondue made with marshmallows and fruit slices make for a sweet ending to any campfire feast.
Making It a Family-Friendly Activity
Involving Kids in the Cooking Process
One of the best aspects of campfire cooking is its ability to engage children in meaningful activities while teaching them valuable life skills. Start by assigning age-appropriate tasks that allow kids to feel involved without compromising safety. Younger children can help arrange tortilla chips on the foil or sprinkle shredded cheese evenly across the base layer. Older kids can assist with chopping vegetables (under supervision) or stirring sauces like guacamole or pico de gallo.
Encourage creativity by setting up a DIY topping station where each family member can customize their own nachos. Provide bowls filled with various ingredients—shredded cheese, diced tomatoes, sliced jalapeños, and black beans—and let everyone choose what they like best. This interactive approach fosters teamwork and allows individuals to express their preferences, making mealtime more enjoyable for all.
Turning Assembly Into a Game
To keep things fun and engaging, transform the assembly phase into a friendly competition. Set a timer and challenge each participant to create their ultimate nacho masterpiece within a specified timeframe. Offer small prizes, such as first dibs on dessert or choosing the next activity, to motivate everyone to participate fully. Not only does this add excitement to the process, but it also creates lasting memories of shared laughter and camaraderie.
Educational Opportunities
Camping trips present numerous opportunities for learning, especially when it comes to food preparation. Use this occasion to teach children about nutrition, portion control, and sustainable practices. Discuss the importance of balancing proteins, carbohydrates, and fats in meals while emphasizing the benefits of incorporating fresh produce into their diets. Additionally, explain why reducing waste and reusing materials whenever possible contribute to preserving the environment for future generations.
Cleaning Up After the Meal
Responsible campers prioritize cleanliness and environmental stewardship. Begin cleanup immediately after finishing your meal to prevent attracting wildlife. Dispose of trash properly in designated bins or take it home if facilities aren’t available.
Wash reusable utensils and dishes with biodegradable soap and dispose of wastewater at least 200 feet away from water sources. Pack out all leftover food scraps to maintain pristine wilderness conditions. By following these guidelines, you contribute to preserving nature for future generations.
Conclusion
Campfire grilled nachos represent more than just a tasty snack—they symbolize connection, creativity, and the joy of shared experiences. With careful planning and execution, this recipe transforms ordinary camping trips into memorable adventures filled with laughter and delicious food. So gather your friends and family, light up the fire, and get ready to savor the magic of campfire cooking!
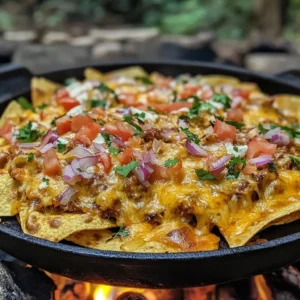
Campfire Grilled Nachos
Equipment
- Cast iron skillet or foil pan (for cooking over the campfire)
- Tongs or spatula
- Mixing bowl (for preparing ingredients)
- Knife and cutting board (for chopping toppings)
- Campfire or grill
Ingredients
- For the Nachos:
- 1 bag of tortilla chips about 10–12 oz
- 2 cups shredded cheese cheddar, Monterey Jack, or a blend
- 1/2 pound ground beef or substitute with cooked chicken or beans for a vegetarian option
- 1 packet taco seasoning or homemade seasoning mix
- 1/4 cup water to mix with taco seasoning
- Optional toppings:
- Diced tomatoes
- Sliced jalapeños
- Chopped green onions
- Guacamole or sliced avocado
- Sour cream
- Salsa or pico de gallo
- Fresh cilantro
Instructions
- Prepare the Campfire : Set up your campfire or grill to medium heat. Place a cast iron skillet or foil pan over the fire to preheat.
- Cook the Ground Beef : In the skillet, brown the ground beef over the campfire, breaking it into small pieces with a spatula. Once cooked through, drain excess grease if needed. Stir in the taco seasoning and water, and simmer for 2–3 minutes until thickened. Remove the beef from the skillet and set aside.
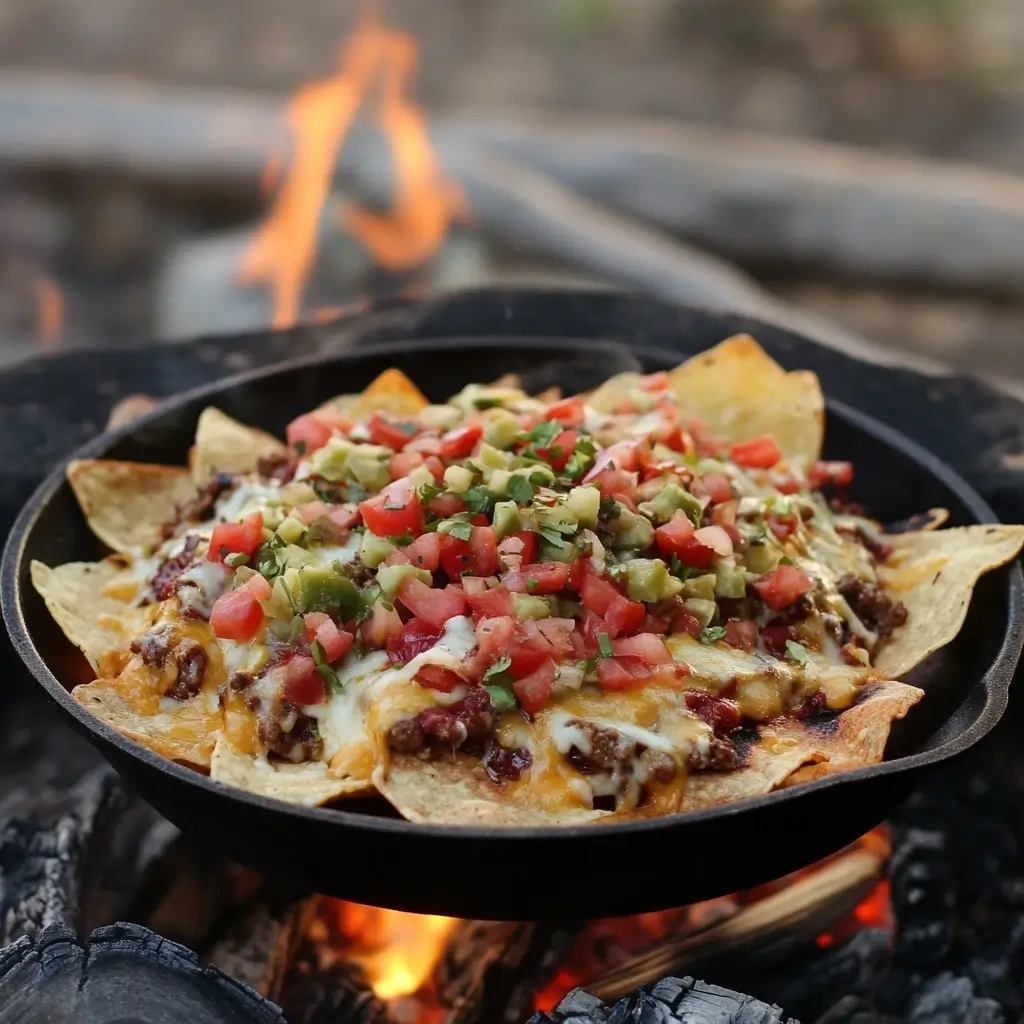
- Layer the Nachos : Spread a layer of tortilla chips evenly in the skillet or foil pan. Sprinkle half of the shredded cheese over the chips, followed by half of the seasoned ground beef. Add another layer of chips, then top with the remaining cheese and beef.
- Melt the Cheese : Place the skillet or foil pan back over the campfire or grill. Cook for 5–7 minutes, or until the cheese is fully melted and bubbly.
- Add Toppings : Remove the skillet from the heat and add your favorite toppings, such as diced tomatoes, jalapeños, green onions, guacamole, sour cream, salsa, and cilantro.
- Serve : Use tongs or a spatula to serve the nachos directly from the skillet. Enjoy while hot!
Notes
For a vegetarian version, replace the ground beef with black beans or sautéed vegetables like bell peppers and onions.
Use a mix of cheeses (e.g., cheddar and Monterey Jack) for extra flavor.
Pre-chop all toppings before heading to the campsite to save time.